Settings
After opening the settings, a list of available configuration options will be shown. These settings are categorized in the following sections:
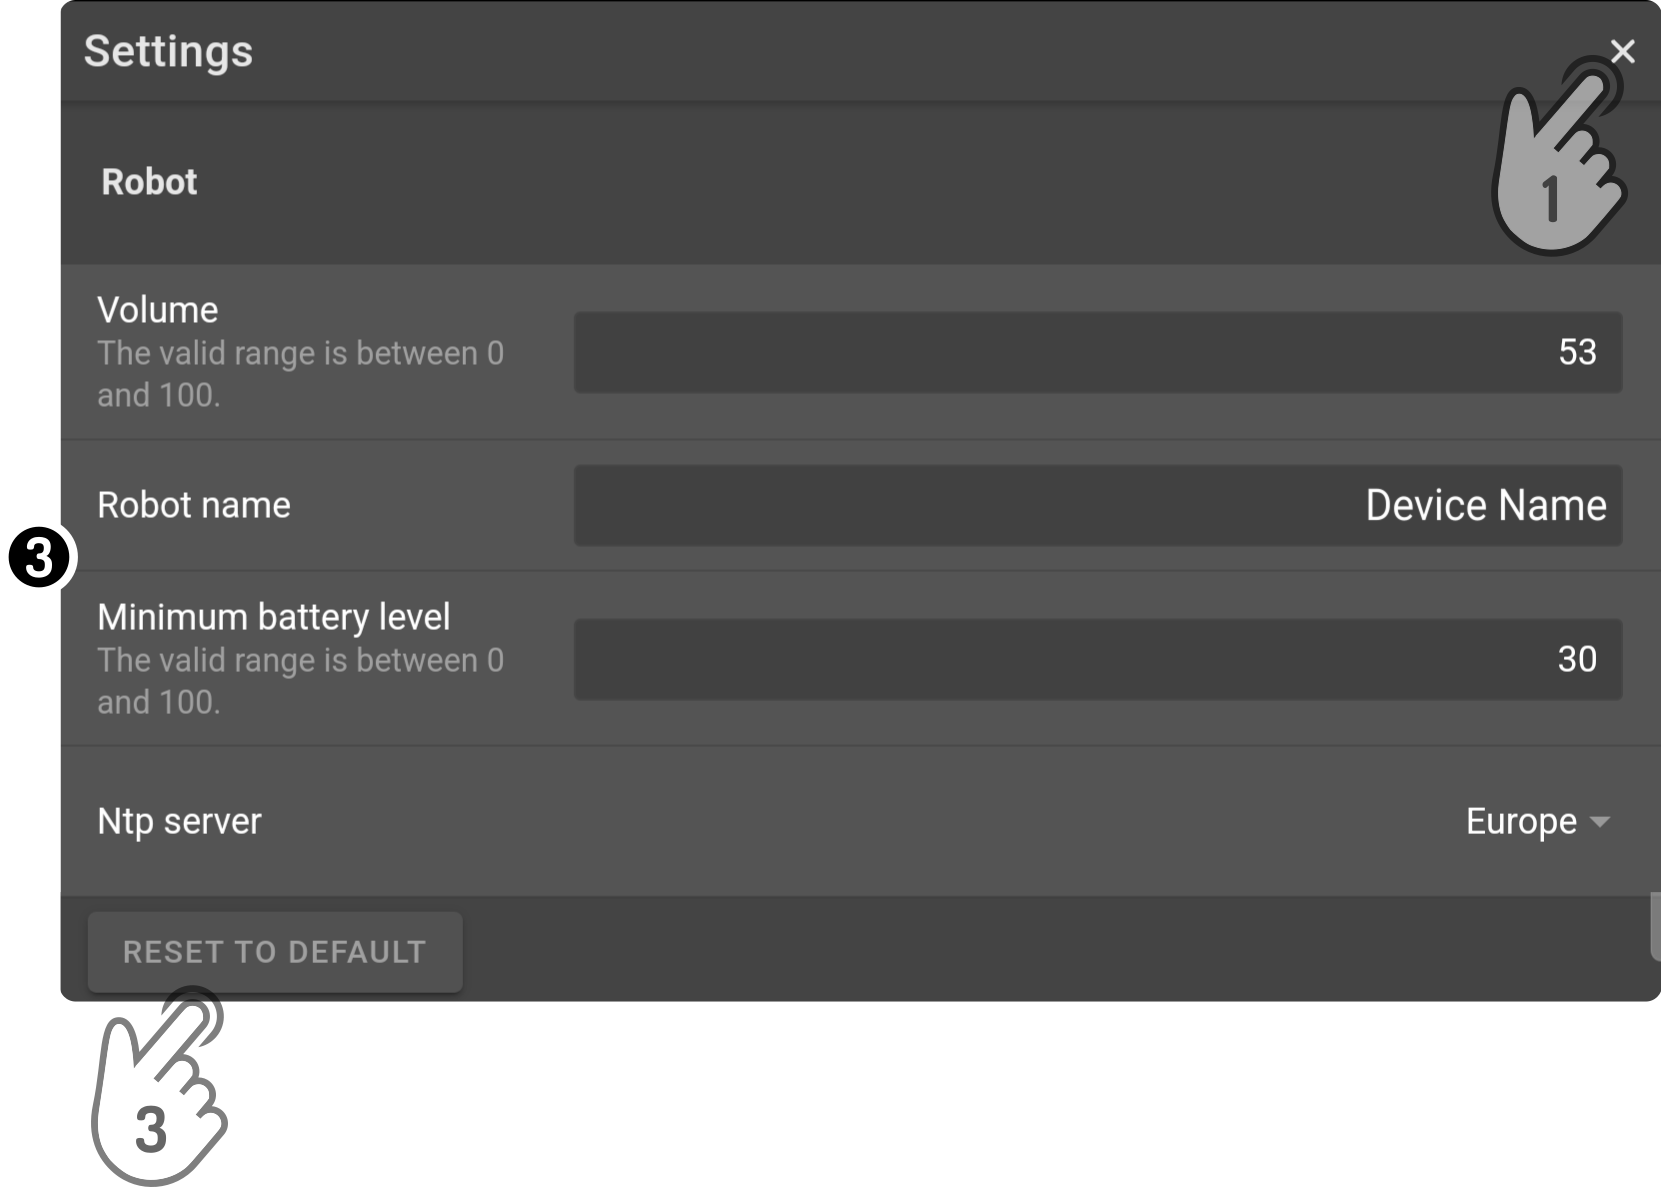
For example, the available settings for the device are:
-
Tap the icon
 to close the settings
 -
Change any of the settings to apply them to the device
-
Tap the button Reset to default to restore the factory settings for these settings
| The available options are heavily dependent on the connected device. |
Device settings
This section contains the general settings of the device:
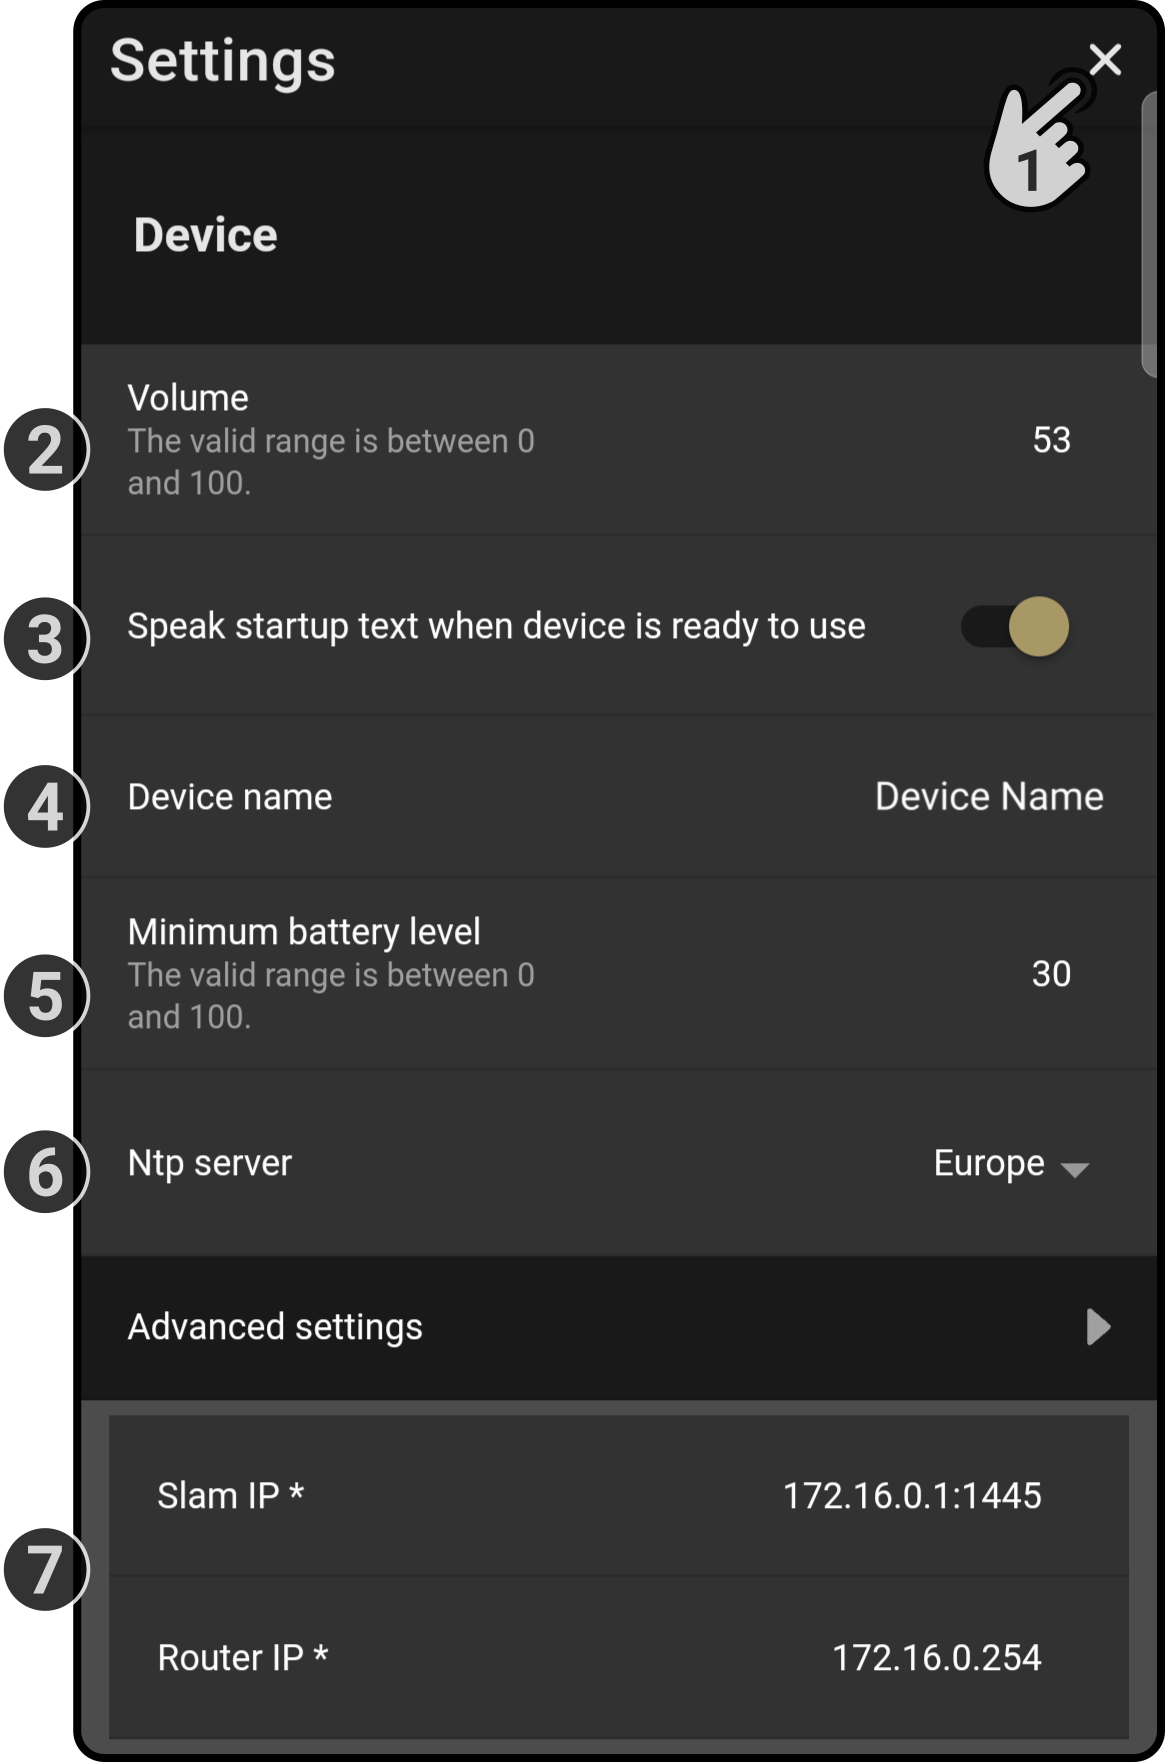
Note that the list of available settings is based on the connected device. For example, a generic Android device will not display the options for SLAM.
-
Enter a 'Volume' value to change the on-device volume
This setting can also be changed using the title bar. -
Enter a 'Device name' to change the name of the device, which will be displayed in the list of registered devices.
-
Enter a 'Minimum battery level' (in percentages) to change when the device should execute the low-power mode actions (for example, go to charging station, crouch, …).
-
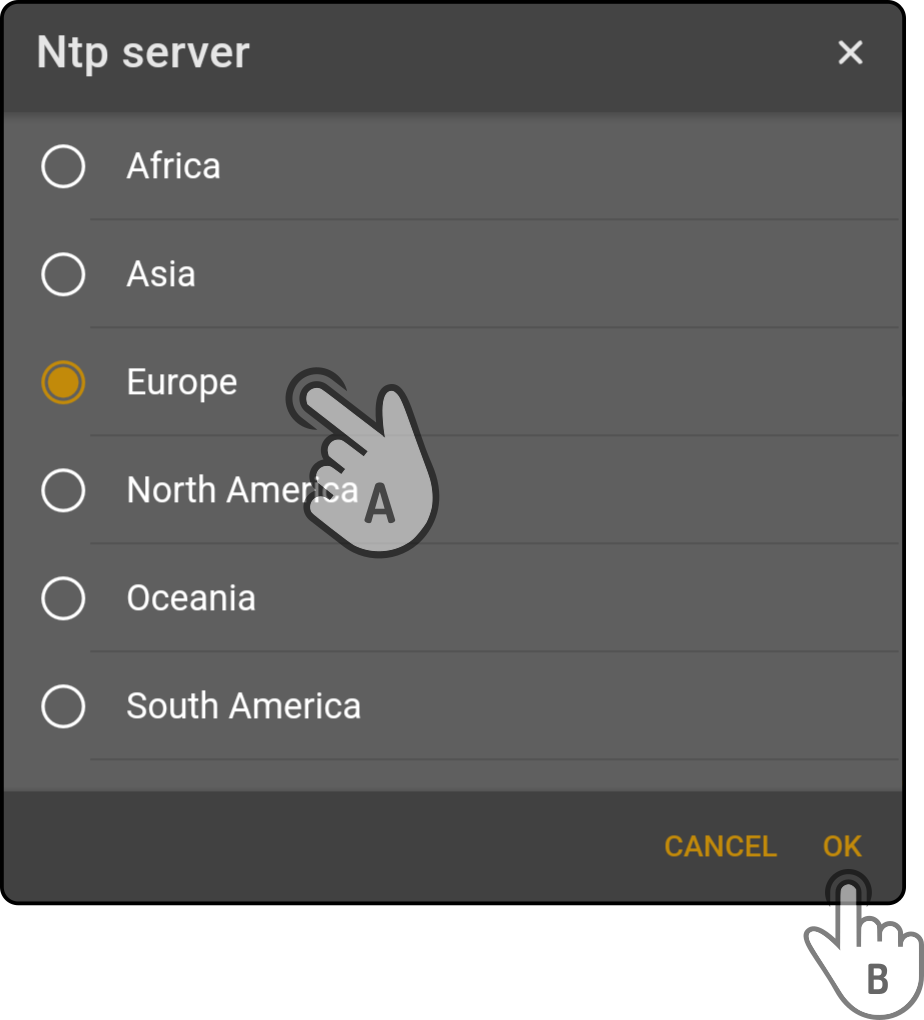
Tap the option 'Ntp server' to select a server for the device to sync the date/time from:
-
Tap an NTP server to sync the date and time to in the list to select it
-
Tap the button 'OK' to apply the change and close this modal
-
-
Tap the option 'Advanced settings' to show or hide the advanced settings for the device(1).
-
After displaying the advanced settings, enter the values for the 'Slam IP' and 'Router IP' to use a custom configuration.
(1): The advanced settings should only be used if an external SLAM module is required.
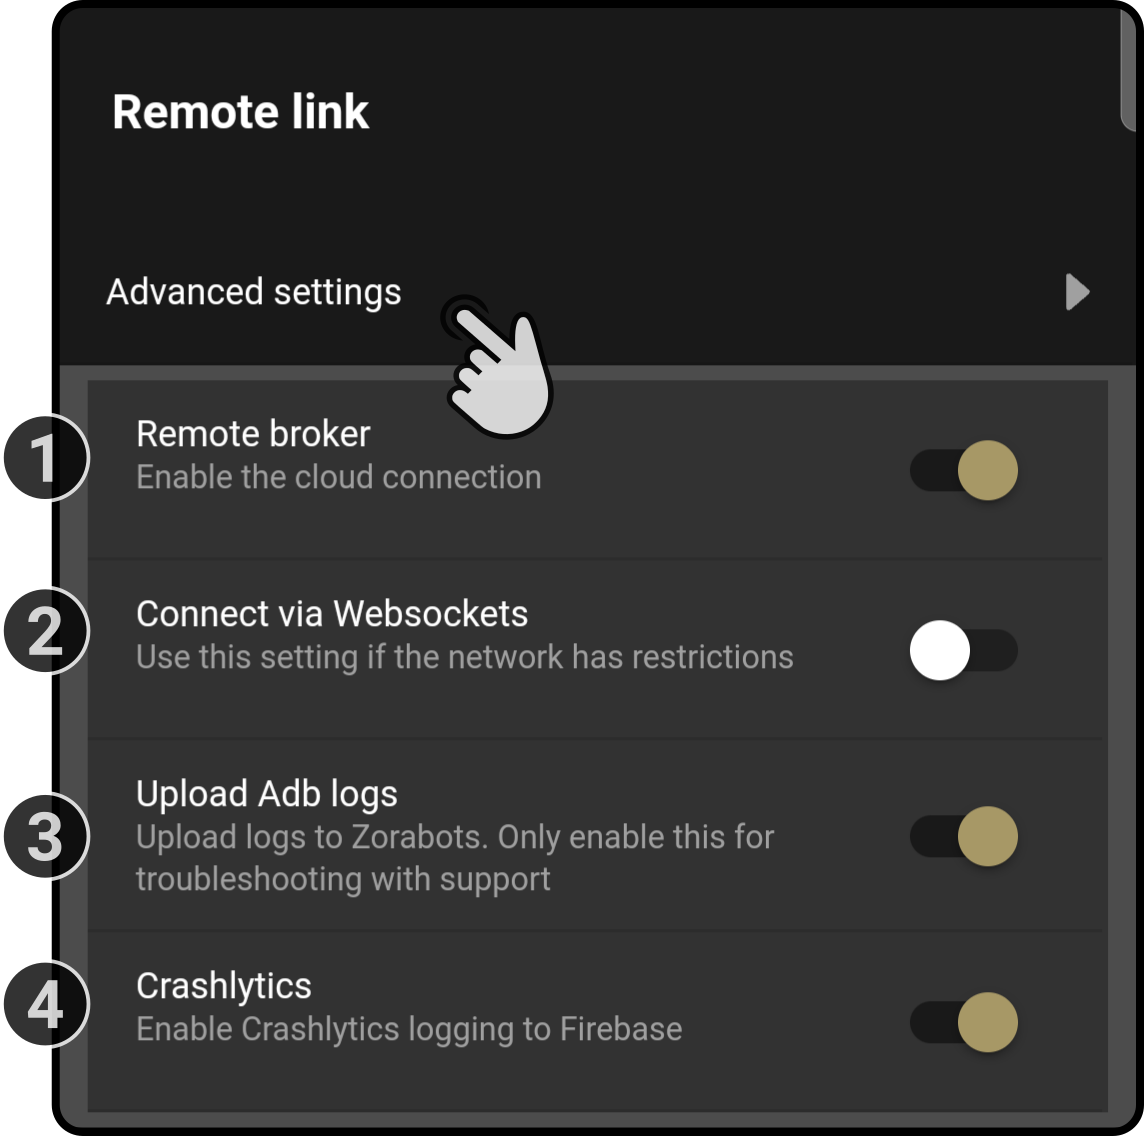
Remote link
This category contains the settings allowing the device to be controlled or monitored via the internet:
-
Toggle the option 'Remote broker' to (not) allow the device to be controlled via the ZBOS Cloud
-
Turn the option 'Connect via webhooks' on to connect to the cloud using a webhook configuration. Otherwise, the default configuration will be used.
-
Toggle the option 'Upload ADB logs' to (not) send reports to our development team
-
Toggle the option 'Crashlytics' to (not) allow detailed error logs to be uploaded to Firebase Crashlytics
| The option 'Upload ADB logs' should only be enabled should there be issues with the software. |
Speech
This category contains the settings for the speech engine:
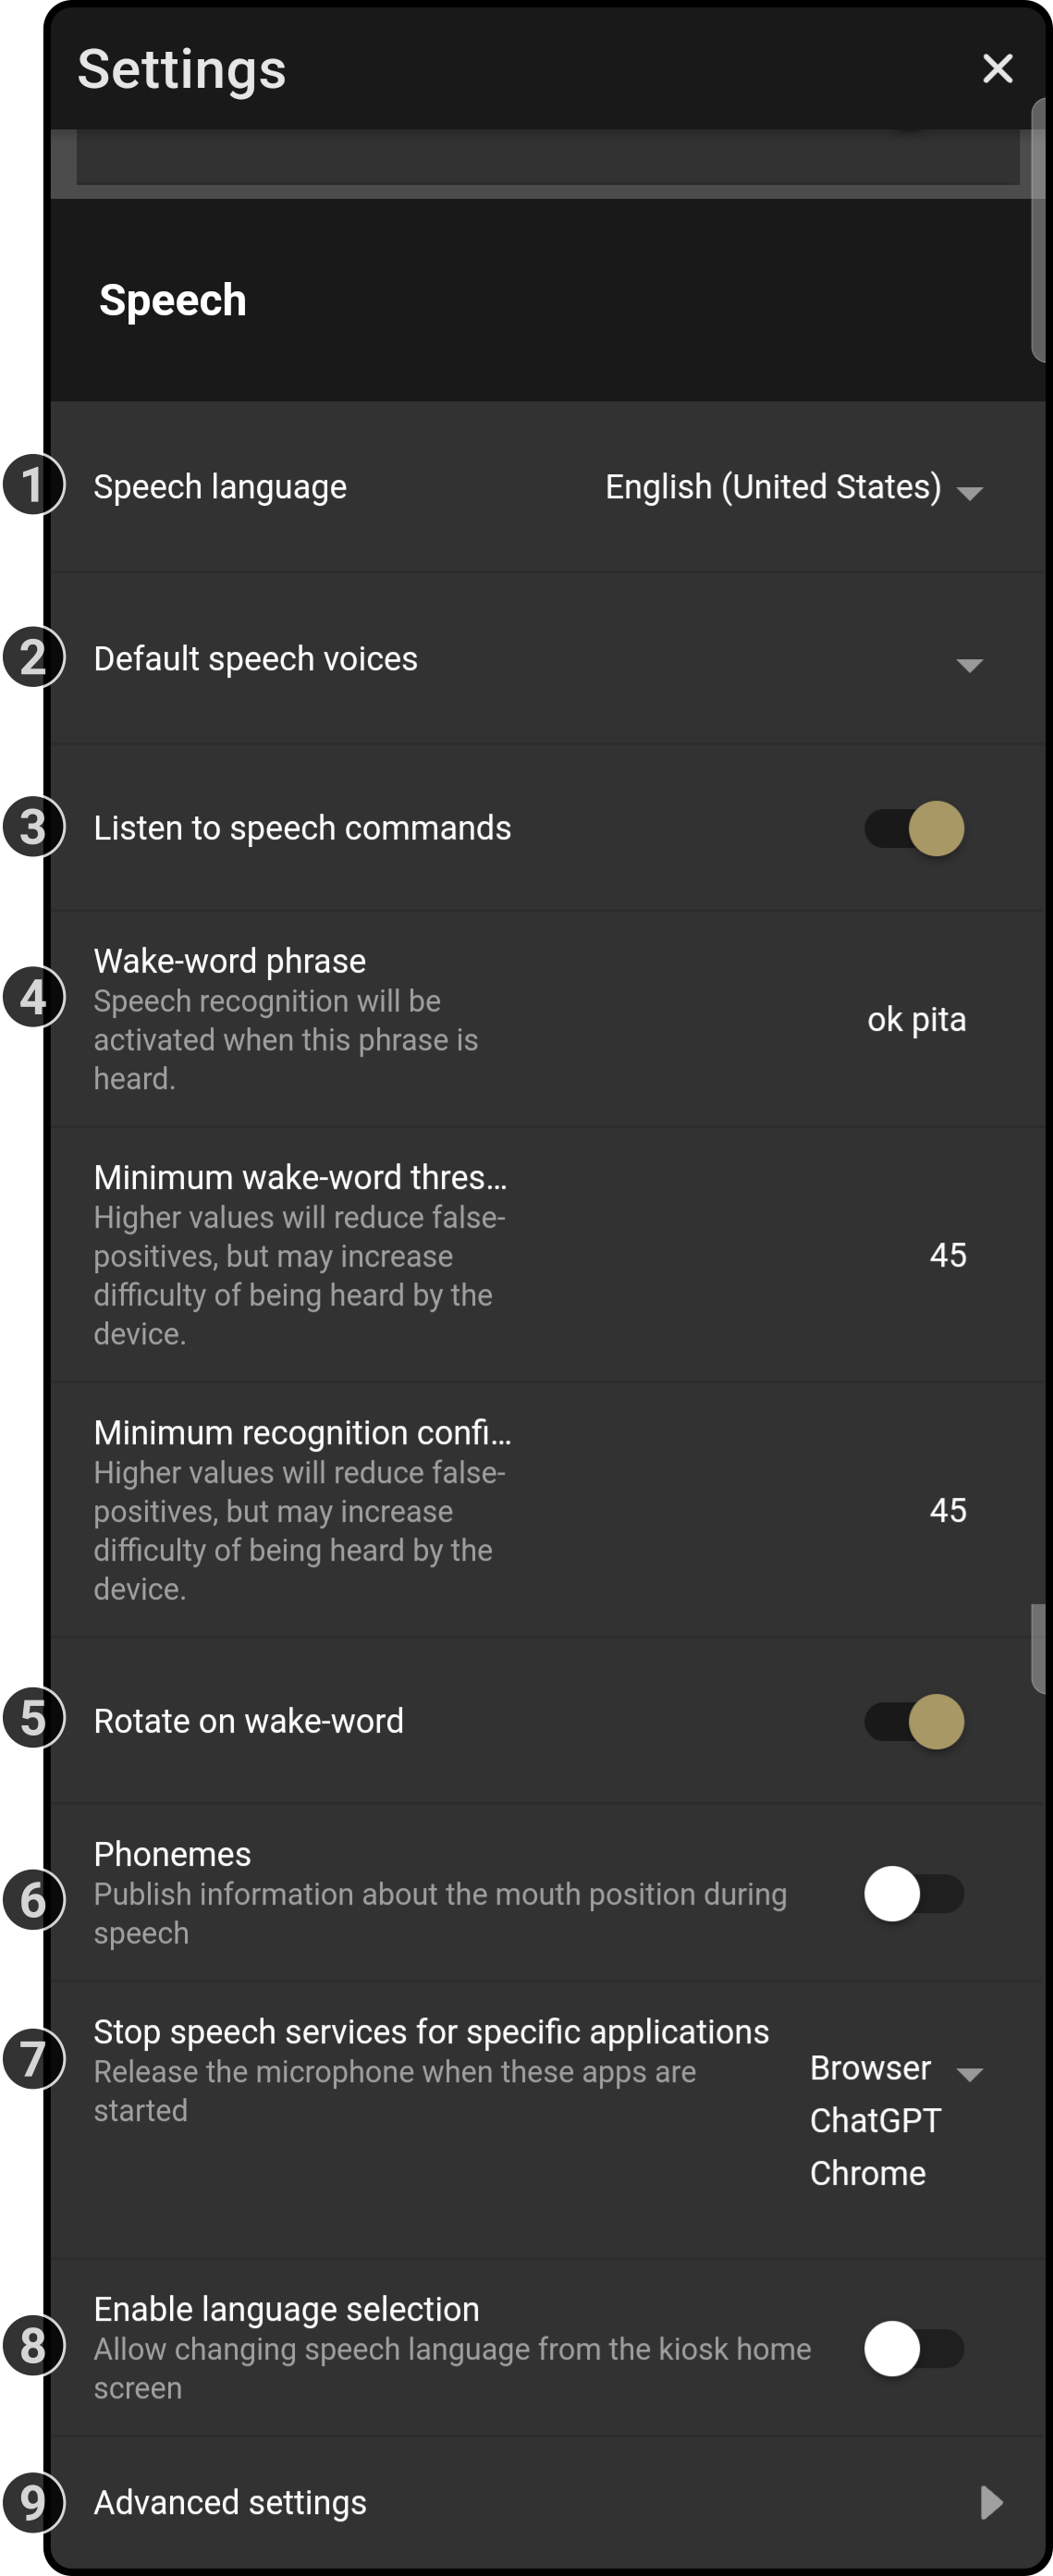
| Not all options are available for all devices. |
-
Tap the option 'Speech language' to select the language for the device to talk in and respond to.
Only the languages installed on the device will be shown.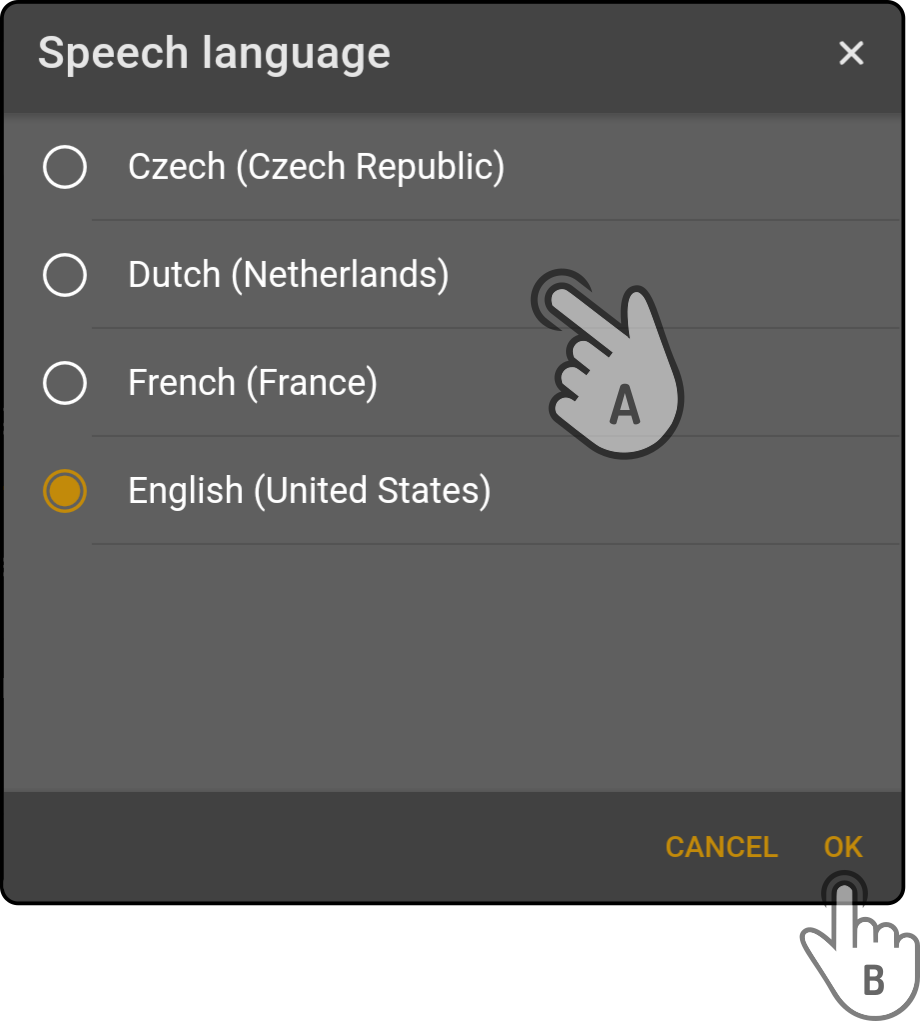
-
Tap a language to be used for the voice recognition
-
Tap the button 'OK' to close this modal and apply the changes
-
-
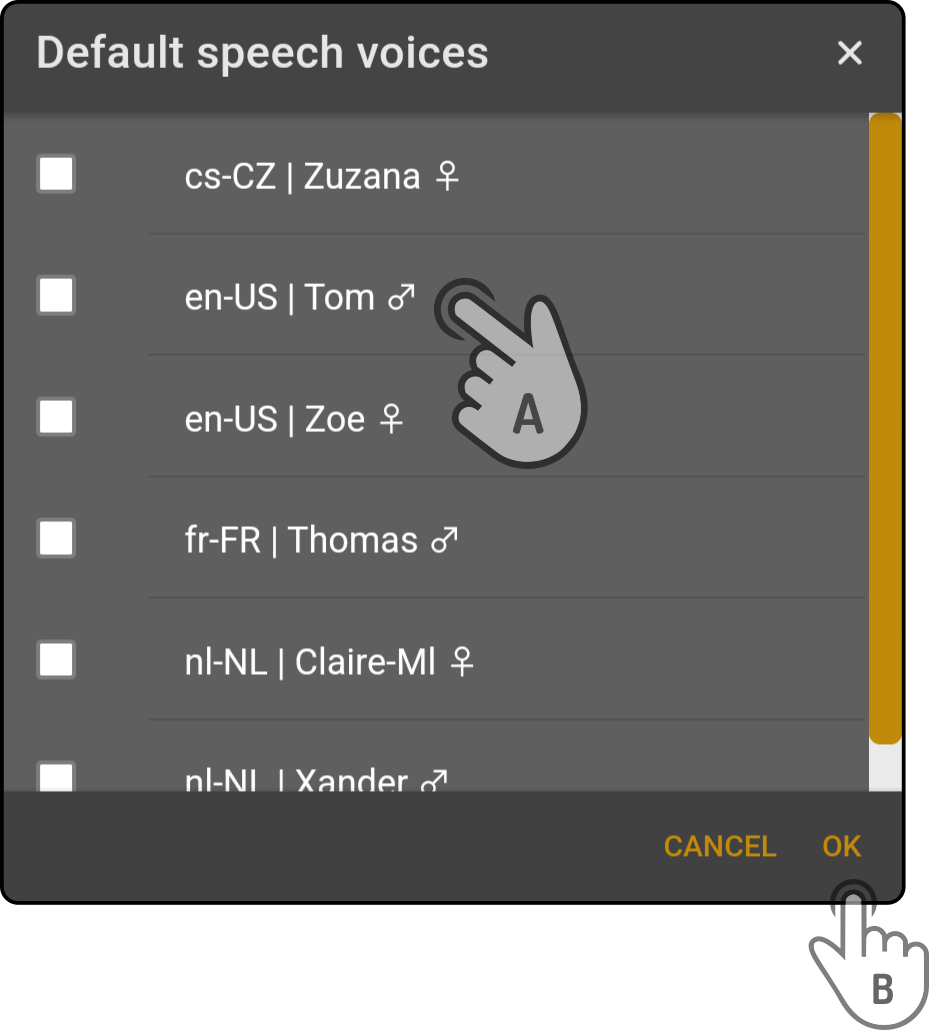
Tap the option 'Default speech voices' to select which voice should be used by default(1) for responses from the device.
-
Tap a voice to be used by default
-
Tap the button 'OK' to close this modal and apply the changes
The voice needs to be installed on the device. See Software for more information on installing optional software (including languages and voices). -
-
Toggle the option 'Listen to speech commands' to (not) allow the device to listen to voice commands.
-
Enter a custom wake-word phrase to use instead of the default wake-word.
Optionally, increase the value for the 'Minimum wake-word threshold'(2) to reduce false positives, but it may also increase the difficulty of the wake-word being recognized by the device.
Optionally, increase the value for the 'Minimum recognition confidence' (2) to reduce false positives, but it may also increase the difficulty of the commands being recognized by the device. -
Toggle the option 'Rotate on wake word' to (not) let the device turn to the location of the voice saying the wake word.
-
Toggle the option 'Phonemes' to (not) send additional information on mouth movement should be published (3)
-
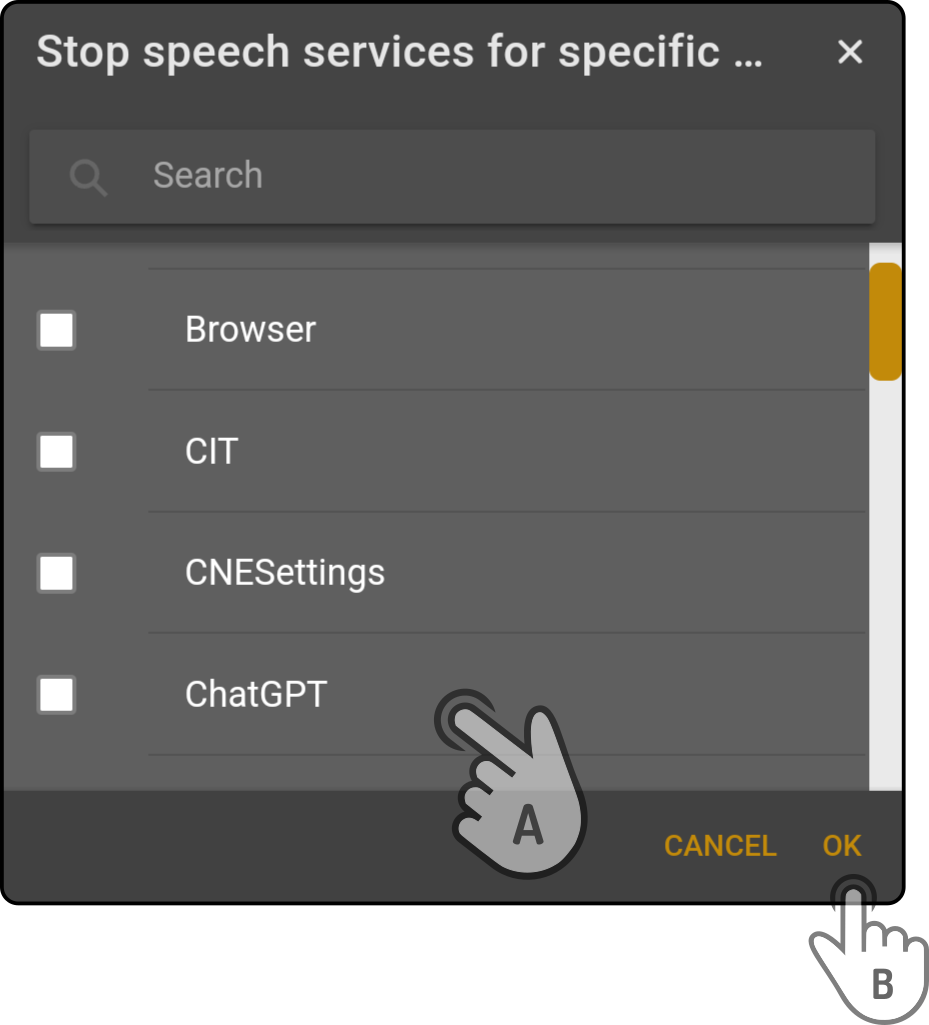
Toggle the option 'Stop speech services' to select which of the installed apps should use the microphone of the device when they are in the foreground, temporarily disabling the built-in ZBOS speech engine.
-
Tap an app in the list to select it
-
Tap the button 'OK' to close this modal and apply the changes
-
-
Toggle the option 'Language selection' to (not) display an additional option in the menu allowing users to change the language the device listens to and talks in.
-
Tap the option 'Advanced settings' to select which 'Dialog profile' the speech engine(4) should use.

-
Tap the option 'Advanced' to view the advanced options for the speech engine
-
Tap the option 'Dialog Profile' to select which service the speech engine should use:
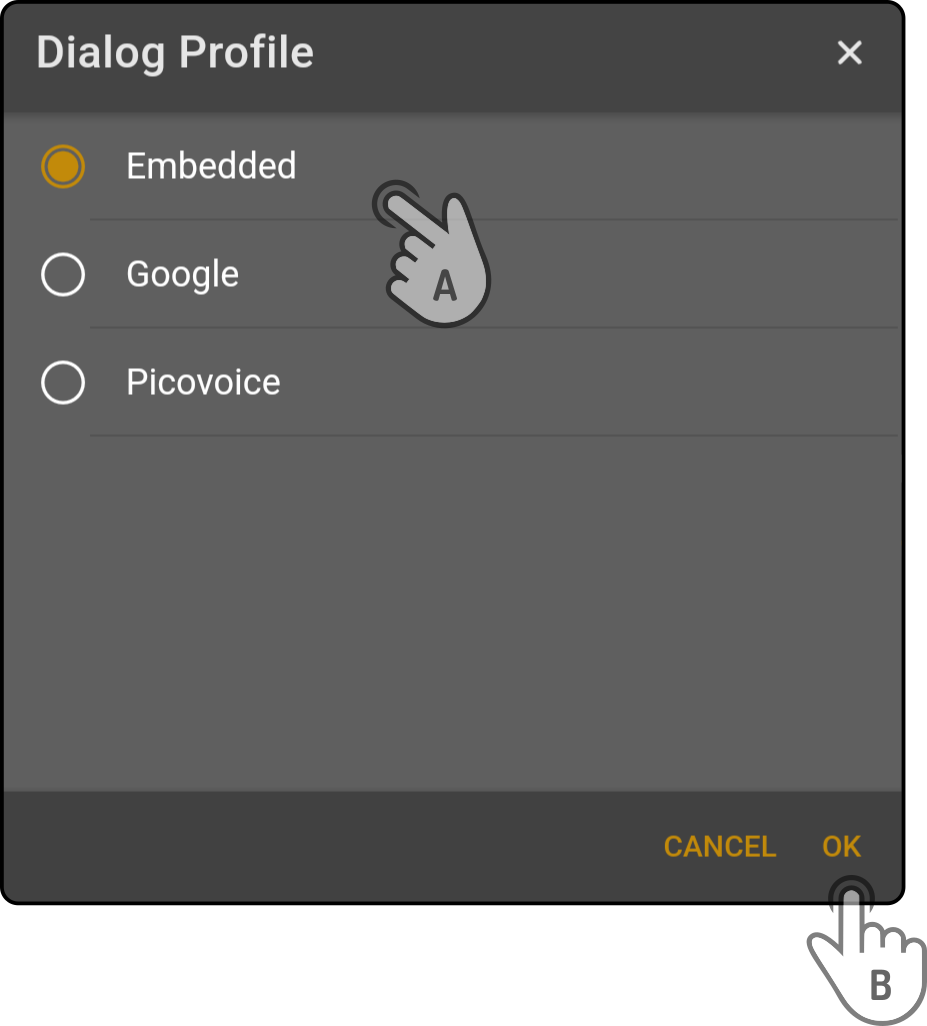
-
Tap the speech profile to use
-
Tap the button 'OK' to close the modal and apply the changes
Once the speech profile has been updated, the properties of the speech engine will be shown in the advanced settings. For example, when using the Google Dialogflow profile, the following options will be shown:

Enter the credentials for the custom Dialogflow Service account (as retrieved from the Google Cloud platform) to use the Dialogflow speech profile. If no credentials are entered, the default Dialogflow will be used instead.
-
|
Location
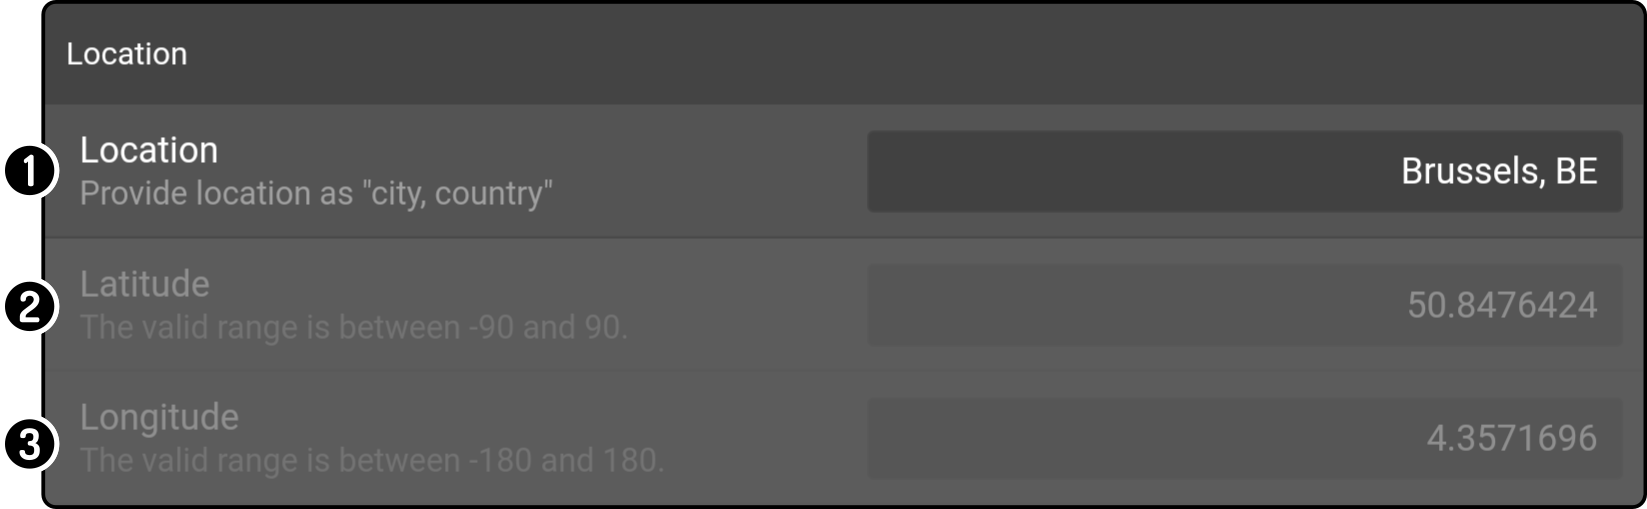
This category contains the settings for the location which can be used for location-aware functionality, such as the weather service:
-
Enter a value for the 'Location' (e.g. 'Brussels, BE')
-
The latitude of the city is entered automatically (1)
-
The longitude of the city is entered automatically (1)
(1): Internet access is required for Control to retrieve the geocode coordinates.
Quiet hours
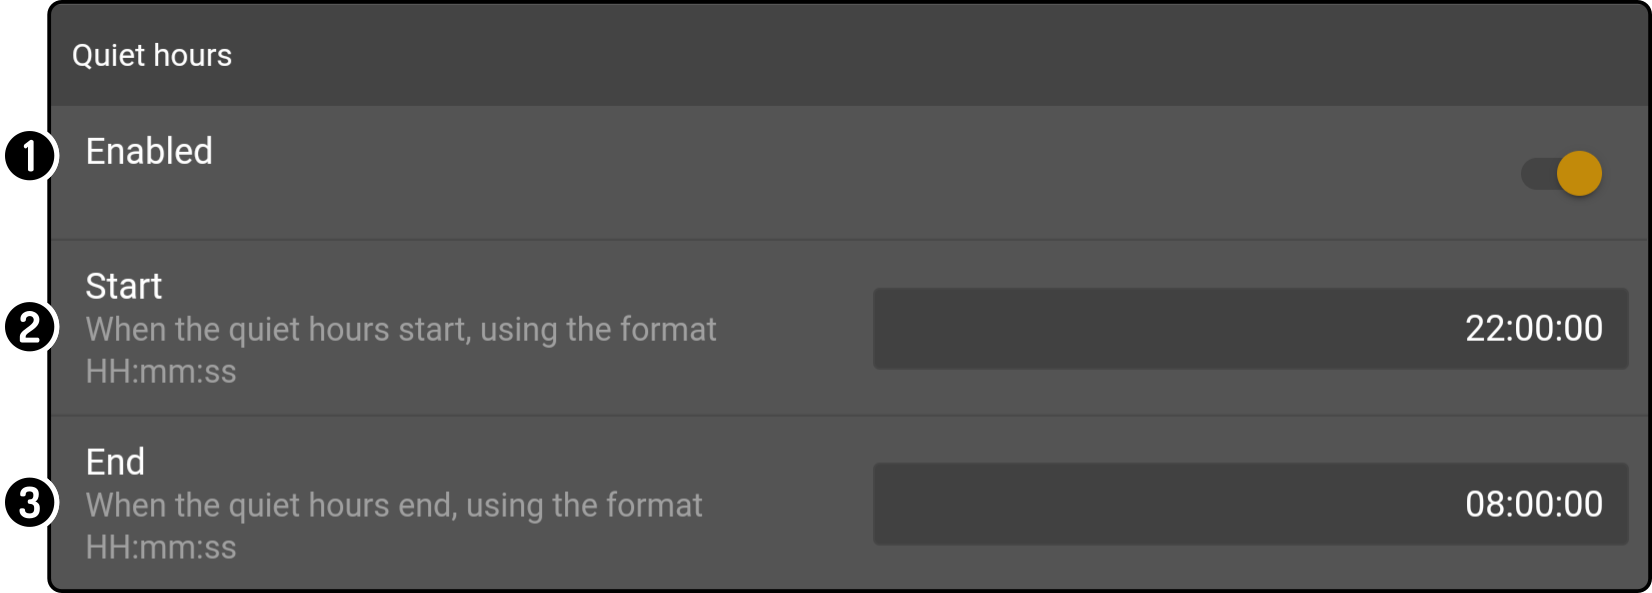
This category contains the settings for the quiet hours:
-
Toggle the option 'Enabled' to (not) use the quiet hours.
-
Enter the 'start' time for the duration when the device is quiet
-
Enter the 'end' time for the duration where the device is quiet